Test Case/en
Test cases are the elements of test plans. They are added to a test plan by dragging an action into the plan's item list. You can also use the copy-paste function via the right-button menu or keyboard shortcuts.
Any action (textual/eleemntary and compound) can be put into a test plan's list. Although we recommend wrapping single elementary actions into a compound; this makes debugging easier, as you can then place a breakpoint or additional trace actions more easily.
If the test case action has input pins, values for them are provided by the test plan. Thus, an action can be used in multiple scenarios possibly with different input values.
Inhaltsverzeichnis
- 1 Typical Scenario
- 1.1 Creating the Test Plan
- 1.2 Defining a Test Action
- 1.3 Testing the Action in Isolation
- 1.4 Making it a Test Case
- 1.5 Making the Test Action Parametrized
- 1.6 Reusing with Different Parameters
- 1.7 Renaming the Test Action
- 1.8 Multiple Test Cases using the same Test Action
- 1.9 Required vs. Optional Test Cases
Typical Scenario[Bearbeiten]
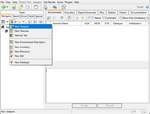
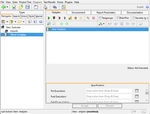
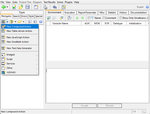
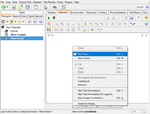
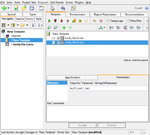
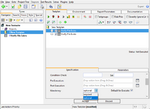
The following screenshots demonstrate how a test case is added to a test plan:
Creating the Test Plan[Bearbeiten]
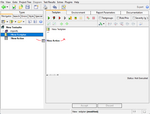
Select the "New Testplan" menu function. In a real world example, you should give it a proper name. Be reminded, that you can define multiple test plans in a suite and also import them from a library.
Once created, the testplan editor at the right is showing the test plan's attributes (scroll the right bottom pane down to see them all). Initially, the list of test cases is empty.
The next step is to define a test action...
Defining a Test Action[Bearbeiten]
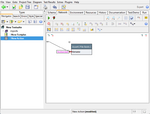
Select the "New Compound Action" menu function (and give it a better name). The right editor pane now presents the various aspects of the action:
- "Scheme" which shows the outside or external view (the scheme) of the action
- "Network" which shows the inner workings (the implementation)
- "Environment" contains local variables of the action (if needed)
- "Test/Demo" contains a setup to the run this action in isolation
- "Run" which contains the outcome of the action's last execution
We'll come back to those additional sub-panes later. For now, lets go to the "Network" tab and define the operations performed by the action...
Let's assume, the test consist of an assertion, that a particular file exists.
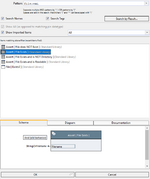
In the "Network Editor", right-click for a menu and select "New Step".
In the dialog, enter "file" (or "exist" or "file;exist") into the "Pattern" filter field at the top, then find and select the "Assert [ File Exists ]" action below. Click on "OK" (or double click on the action in the list) to close the dialog and place the new step into the network.
You can of course also experiment with other actions here, for example the plain "File [Exists?]" action, followed by an "Assert [True]" or a 2-way-if combination followed by a "Fail" action.
Notice that the step requires an input (named "filename"). Double-click on that pin and enter a filename. As an alternative to double-clicking, select it and press enter, or select it an right-click for a menu.
As a first test, choose a file which does not exist, such as "foobar.baz".
Testing the Action in Isolation[Bearbeiten]
Click on the "Run"-button (the green triangular button below the tab-labels) to run your test action. The editor will switch to the "Run" tab and present a trace of what was going on. Obviously, the test's outcome will be a failure, as the file does not exist. That was expected and intended here.
Making it a Test Case[Bearbeiten]
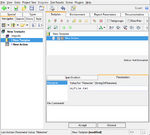
Now select the test plan again in the left tree view. And drag the new test action from the tree pane into the list at the right side.
Pressing the run button executes all items in the list of test cases. Since there is only one at this time, the activity log looks pretty much the same as when the action was executed in isolation.
Making the Test Action Parametrized[Bearbeiten]
Now, let's change the test action to expect the filename as an input parameter, instead of the hardcoded "foobar.baz".
Select the action in the tree again, go to the diagram/network tab, and start a drag from the pin to the left boundary of the diagram (a centimeter or so to the right of the left border of the diagram view; the cursor will change to a little pin-picture when you reached the drop area).
A confirmation dialog asking what should happen with the original freeze value (i.e. "foobar.baz") appears;
click on "Freeze in all Steps" to close that dialog.
Alternatively, add a new input pin to the test action (either in the schema view or in the network view) and drag a conenction from that new pin to the inner step's filename pin. However, the above is quicker and also sets the name of the new pin conveniently.
Notice that the "Freeze in all Steps" action added the original freeze value as input to the "Test/Demo" network. If you had clicked on "Forget" instead, that pin would now be without value and you had to enter it again for the "Test/Demo" to be runnable.
Reusing with Different Parameters[Bearbeiten]
Go back to the test plan editor, and select the test case item in the list. Notice, that a new tab named "Parameters" is now shown at the bottom right.
This tab only appears if a test case action needs an input value, which was not the case before.
The test case can now only be executed if a parameter value is provided (try without to see what happens).
Enter a filename (valid or not) into the parameter field and run the test again. Of course, depending on the existance of the file you entered, you'll get either success or a failure.
Renaming the Test Action[Bearbeiten]
It is now time to give the test action a better name (if you did not do so before). In the tree, select the test action, and use the right-click menu function "Rename" or the "F2" shortkey.
Let's call it "Verify File Exists".
Multiple Test Cases using the same Test Action[Bearbeiten]
Go back to the test plan, select the (now renamed) "Verify File Exists' test case item and copy-paste it (menu function or keyboard shortcut).
Select each new item and change the corresponing filename parameter.
Then run the test plan again.
Required vs. Optional Test Cases[Bearbeiten]
If both entered filenames exist, you'll get a successful (green) result.
If the first file does not exist, the test plan stops after the failing test case, not executing further steps. This behavior is controlled by the Mandatory choice, which can be either "required" or "optional". "Required" is the default, and means that a successful outcome of that test is a prerequisite for further tests. "Optional" means that followup tests should still be executed, even if that test fails.
You should leave them as "required", if it does not make sense to try any folloup tests on a failure (for example, if a login or power up sequence fails), and "optional" if the tests are independent of previous outcomes.
Try to change the settings. You can also select multiple test case items and use the roght-click menu function "Selection" → "Make Optional Testcase" to change multiple items with one click.
