Node-RED Tutorial - Part 2: Unterschied zwischen den Versionen
Zur Navigation springen
Zur Suche springen
Frhenn (Diskussion | Beiträge) |
Frhenn (Diskussion | Beiträge) |
||
| (12 dazwischenliegende Versionen desselben Benutzers werden nicht angezeigt) | |||
| Zeile 3: | Zeile 3: | ||
= Preconditions = |
= Preconditions = |
||
* Installed chrome browser |
|||
* Open the testsuite from tutorial - part 1 |
|||
*Make sure you did the step '''Specify necessary paths''' from the first part of the tutorial before you make this part. [[Node-RED Tutorial - Part 1]] |
* Make sure you did the step '''Specify necessary paths''' from the first part of the tutorial before you make this part. [[Node-RED Tutorial - Part 1]] |
||
= Collect Nodes from the Node-RED library = |
= Collect Nodes from the Node-RED library = |
||
| Zeile 30: | Zeile 30: | ||
* A window opens |
* A window opens |
||
** Enter here the node name ''node-red-contrib- |
** Enter here the node name ''node-red-contrib-speedtest-updated'' |
||
** '''Hint:''' If you want to install all nodes which contains e.g. ''smarthome'' in their names just enter ''*smarthome*'' |
** '''Hint:''' If you want to install all nodes which contains e.g. ''smarthome'' in their names just enter ''*smarthome*'' |
||
[[Datei: |
[[Datei:specify node name.png|800px]] |
||
| Zeile 41: | Zeile 41: | ||
** Information about the installation can be found in the lower left corner of the window |
** Information about the installation can be found in the lower left corner of the window |
||
| ⚫ | |||
| ⚫ | |||
| ⚫ | |||
| ⚫ | |||
= Importing the Node = |
= Importing the Node = |
||
| Zeile 54: | Zeile 53: | ||
*A small window opens |
*A small window opens |
||
** The ''.node-red'' folder will be opened automatically |
|||
** Click on the little house icon |
|||
** Navigate to '' |
** Navigate to the ''node_modules'' folder |
||
** Search in |
** Search in the ''node_modules'' folder after a folder called ''node-red-contrib-speedtest-updated'' |
||
** Select the file '' |
** Select the file ''speedtest.html'', then click OK |
||
[[Datei:import |
[[Datei:import speedtest.png|800px]] |
||
| Zeile 67: | Zeile 66: | ||
[[Datei:generated nodes.png|800px]] |
[[Datei:generated speedtest nodes.png|800px]] |
||
*Select and execute ''speedtest'' |
|||
| ⚫ | |||
| ⚫ | |||
* Click on the tab ''Run'' → ''Pins'' to see the result |
|||
[[Datei:see result.png|800px]] |
|||
Aktuelle Version vom 17. Februar 2020, 08:48 Uhr
Inhaltsverzeichnis
Introduction[Bearbeiten]
The following tutorial shows how to import Nodes from the Node-RED library into expecco
Preconditions[Bearbeiten]
- Installed chrome browser
- Make sure you did the step Specify necessary paths from the first part of the tutorial before you make this part. Node-RED Tutorial - Part 1
Collect Nodes from the Node-RED library[Bearbeiten]
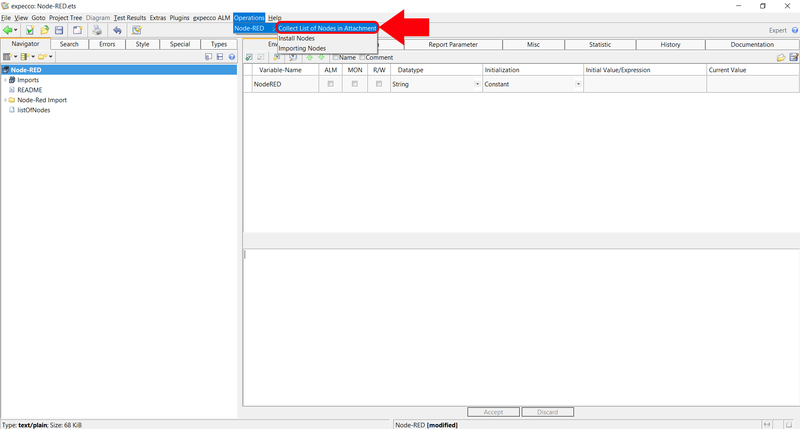
- Click on Operations → Collect List of Nodes in Attachment
- The Node-RED library gets opened in a browser and the names of each node of the library get extracted and saved in the attatchment listOfNodes
- Hint: Collecting the node names take a few minutes and offers the opportunity for a short coffee break
- Node-RED library
Installing Nodes[Bearbeiten]
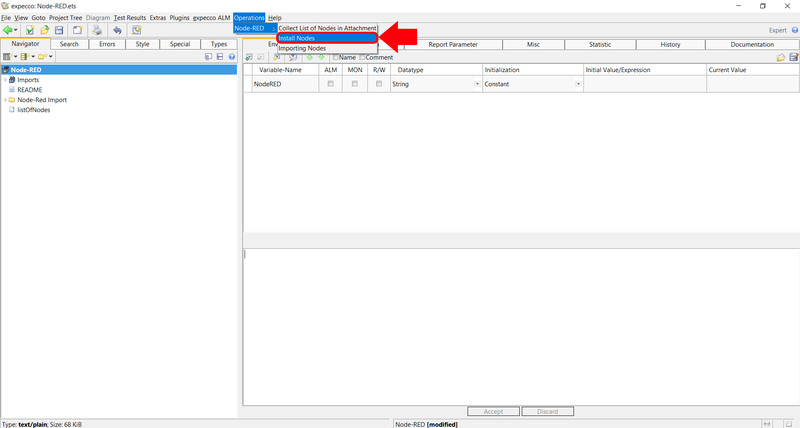
- Click on Operations → Install Nodes
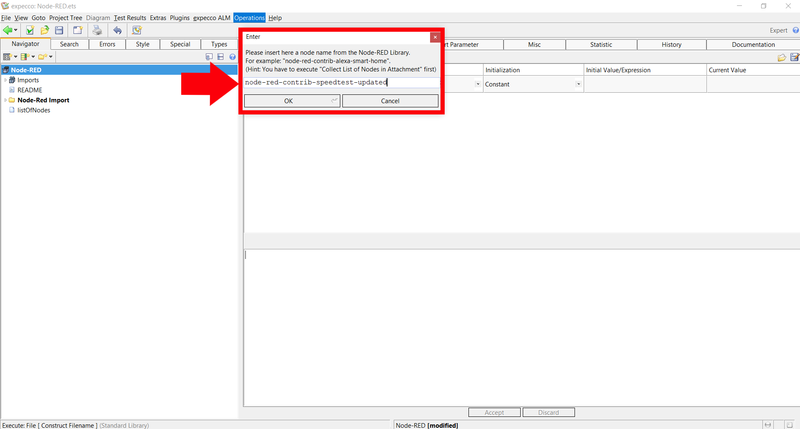
- A window opens
- Enter here the node name node-red-contrib-speedtest-updated
- Hint: If you want to install all nodes which contains e.g. smarthome in their names just enter *smarthome*
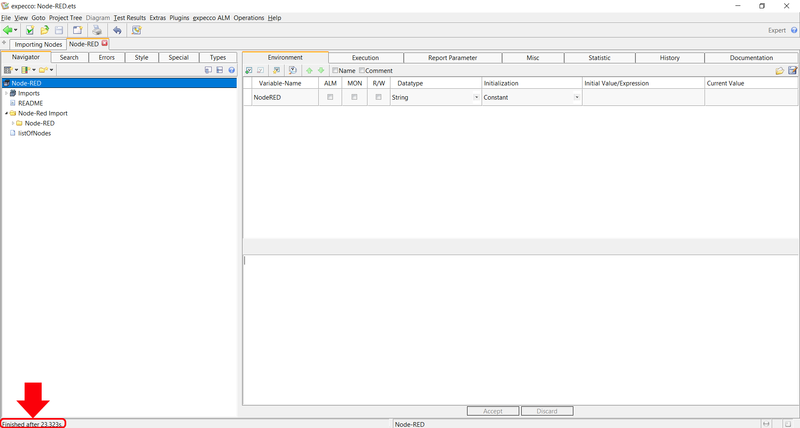
- The entered node will be installed
- Information about the installation can be found in the lower left corner of the window
Importing the Node[Bearbeiten]
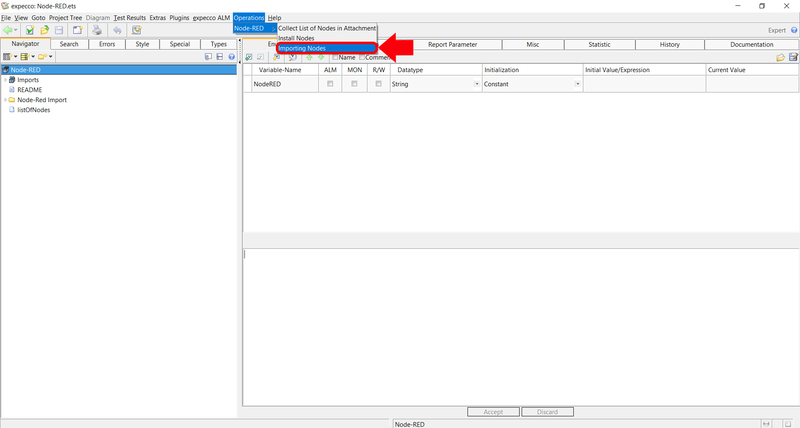
- Click on Operations → Importing Nodes
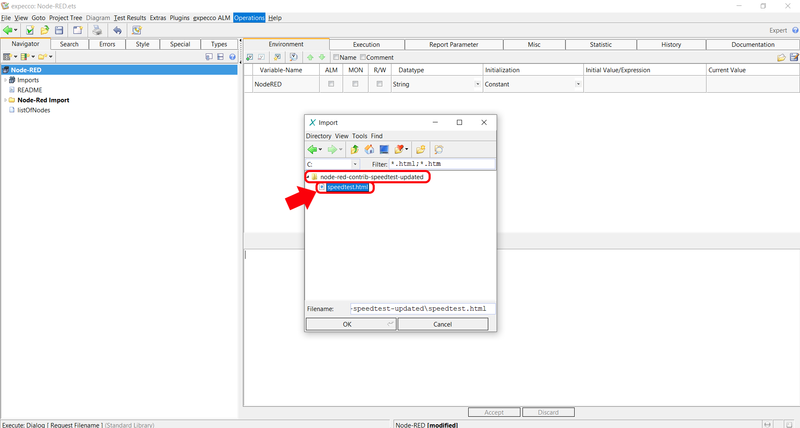
- A small window opens
- The .node-red folder will be opened automatically
- Navigate to the node_modules folder
- Search in the node_modules folder after a folder called node-red-contrib-speedtest-updated
- Select the file speedtest.html, then click OK
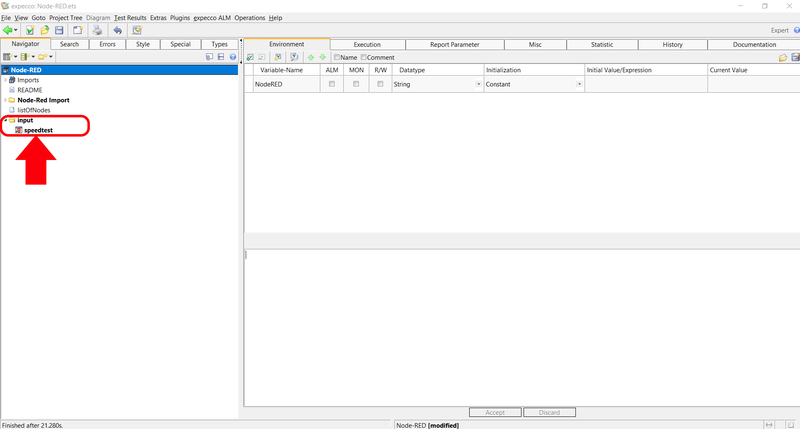
- A new folder should have been created
- Open this folder to see the just generated elementary blocks
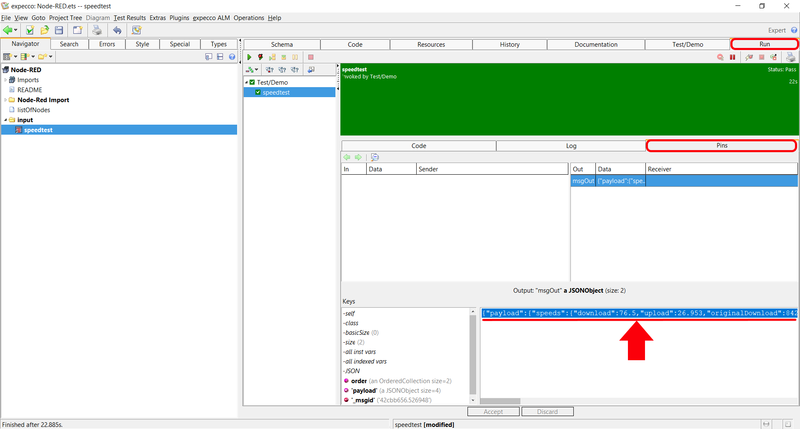
- Select and execute speedtest
- Click on the tab Run → Pins to see the result
