NodeRED/en: Unterschied zwischen den Versionen
Zur Navigation springen
Zur Suche springen
Frhenn (Diskussion | Beiträge) |
Frhenn (Diskussion | Beiträge) |
||
| (35 dazwischenliegende Versionen desselben Benutzers werden nicht angezeigt) | |||
| Zeile 8: | Zeile 8: | ||
* If you haven't installed Node.js yet download and install it here: https://nodejs.org/en/download/ |
* If you haven't installed Node.js yet download and install it here: https://nodejs.org/en/download/ |
||
* Use the command line to verify that Nodejs has been installed correctly. |
|||
* Use the command line to verify that Node.js has been installed correctly. |
|||
** To open the command line enter "cmd" in the Windows search bar and press the enter key. |
|||
[[Datei:Command line.png|350px]] |
[[Datei:Command line.png|350px]] |
||
[[Datei: |
[[Datei:commandline.png|400px]] |
||
*After you have opened the command line |
*After you have opened the command line enter "node --version" |
||
[[Datei: |
[[Datei:verify node version.png|400px]] |
||
*Also |
*Also enter "npm --version" in the command line. |
||
** Hint: npm usually comes with Node.js |
** Hint: npm usually comes with Node.js |
||
[[Datei: |
[[Datei:verify npm version.png|400px]] |
||
| Zeile 35: | Zeile 36: | ||
[[Bild: |
[[Bild:commandline.png|400px]] |
||
| Zeile 41: | Zeile 42: | ||
[[Bild: |
[[Bild:install node-red.png|400px]] |
||
*Enter "npm install node-red-node-test-helper node-red --save-dev" and press the enter key |
|||
[[Bild: Install node-red-node-test-helper command.png|400px]] |
|||
*Enter "node-red" and press the enter key to start Node-RED |
*Enter "node-red" and press the enter key to start Node-RED |
||
** Essential step, because this creates the ''.node-red'' folder in your user directory which we need for further steps |
|||
[[Bild: |
[[Bild:start node-red.png|400px]] |
||
| Zeile 62: | Zeile 58: | ||
[[Bild: Open Node-RED Editor.png|600px]] |
[[Bild: Open Node-RED Editor.png|600px]] |
||
→ Close the browser and the command line |
|||
*Close the browser and the command line now |
|||
*Open a new command line |
|||
= Node-RED Tutorial - Part 1 = |
|||
[[Bild:commandline.png|400px]] |
|||
The following tutorial shows how to import nodes of Node-RED |
|||
into expecco and how to use them. |
|||
== Specify necessary paths == |
|||
*Navigate to the ''.node-red'' folder created by the start of Node-RED |
|||
* Open a new testsuite in expecco |
|||
**Enter "cd .node-red" and press the enter key |
|||
[[ |
[[Bild: node-red folder.png|400px]] |
||
*Enter "npm install node-red-node-test-helper node-red --save-dev" and press the enter key |
|||
* Now you should have the following view in front of you |
|||
** Make sure you are in the ''.node-red'' folder |
|||
[[Datei:Opened Testsuite.png|800px]] |
|||
* Click the undo-button to remove the existing demos |
|||
[[Datei:Click undo-button.png|500px]] |
|||
[[Datei:Blank Testsuite.png|500px]] |
|||
* Click on ''Extras'' → ''Settings'' |
|||
[[Datei:Navigate to Settings.png|800px]] |
|||
* Click on ''Execution'' → ''External Script Interpreters'' → ''Node'' |
|||
[[Datei:Node Settings.png|800px]] |
|||
* Specify at ''Node.js Path'' the path to the Node.js interpreter |
|||
[[Datei:NodeJS.png|800px]] |
|||
* Click on the question mark next to ''Node.js Path'' to verify the node path |
|||
** If the path is correct you will see the version of ''Node.js'' in the lower field |
|||
[[Datei:Verify path.png|800px]] |
|||
* Specify at ''Node-RED'' → ''Module Path'' the path to the ''node_modules'' folder |
|||
** Click on the three points next to the field |
|||
[[Datei:Specify Module.png|800px]] |
|||
* A small window opens |
|||
** Click on the little house icon |
|||
** Click on the user directory of the current user |
|||
** Navigate in the user directory to the ''.node-red'' folder |
|||
** Navigate to the ''node_modules'' folder |
|||
** Select this folder and click ''OK'' |
|||
** Your path in the field of ''Filename'' should look like ''C:\Users\YOUR_USERNAME\.node-red\node_modules'' |
|||
[[Datei:Browse to node_modules.png|800px]] |
|||
* Specify at ''Node-RED'' → ''Execution Directory'' the path to the ''.node-red'' folder |
|||
** Click on the three points next to the field |
|||
[[Datei:Execution Directory Path.png|800px]] |
|||
* A small window opens |
|||
** Click on the little house icon |
|||
** Click on the user directory of the current user |
|||
** Navigate to the ''.node-red'' folder |
|||
** Select this folder and click OK |
|||
** Your path in the field of ''Filename'' should look like ''C:\Users\YOUR_USERNAME\.node-red'' |
|||
[[Datei:Execution Directory.png|800px]] |
|||
*Click on ''Apply'' and then on ''Close'' |
|||
[[Datei:Confirming module and execution path.png|800px]] |
|||
*Click ''YES'' to save the entered paths |
|||
[[Datei:Save paths.png|800px]] |
|||
==Importing a Node == |
|||
*Click on ''Operations'' → ''Node-RED'' → ''Importing Nodes'' |
|||
[[Datei:Importing a Node.png|800px]] |
|||
* A small window opens |
|||
** Click on the little house icon |
|||
** Click on the user directory of the current user |
|||
** Navigate to ''.node-red → node_modules → @node-red → nodes → core → network'' |
|||
** In this folder is a file called ''21-httprequest.html'' |
|||
** Select this file and click on OK |
|||
[[Datei:Select node to import.png|800px]] |
|||
* A new folder should have been created |
|||
** Open this folder and click on the elementary block to get the view which is shown in the picture |
|||
[[Datei:Imported node.png|800px]] |
|||
== Using a Node in expecco == |
|||
*Click on the tab ''Test/Demo'' |
|||
[[Datei:Tab Test-Demo.png|800px]] |
|||
* Click on the elementary block keep the left mouse button pressed and drag the block a little further to the middle of the editor |
|||
[[Datei:pull block to mid.png|800px]] |
|||
* Double click on input pin ''url'' |
|||
** Enter http://exept.de and click on OK |
|||
[[Datei:click url.png|500px]] |
|||
[[Datei:enter url.png|500px]] |
|||
* Click on the green arrow to execute the block |
|||
[[Datei:execute block.png|800px]] |
|||
* After you have executed the block, it takes a few seconds until you see a result |
|||
** When you see a result click on ''Run'' |
|||
[[Datei:click on run.png|800px]] |
|||
* Click on ''Pins'' → ''msgOut'' |
|||
[[Datei:click on pins.png|800px]] |
|||
* Scroll in the field ''Keys'' to ''statusCode'' |
|||
** Click on ''statusCode'' |
|||
** If the HTTP request were successful the number 200 should be in the field next to it |
|||
[[Datei:view status code.png|800px]] |
|||
'''Hint:''' Keep this testsuite open if you want to continue with the second part of the tutorial |
|||
= Node-RED Tutorial - Part 2 = |
|||
This tutorial will show you how to import Nodes from the Node-RED library into expecco |
|||
== Preconditions == |
|||
* Open the testsuite from tutorial - part 1 |
|||
*Make sure you did the step '''Specify necessary paths''' from the first part of the tutorial before you make this part. |
|||
== Collect Nodes from the Node-RED library == |
|||
* Click on ''Operations'' → ''Collect List of Nodes in Attachment'' |
|||
** The Node-RED library gets opened in a browser and the names of each node of the library get extracted and saved in the attatchment listOfNodes |
|||
** '''Hint:''' Collecting the node names take a few minutes and offers the opportunity for a short coffee break |
|||
[[Datei:Navigate to Collect List of Nodes.png|800px]] |
|||
* Node-RED library |
|||
[[Datei:Node-RED library.png|800px]] |
|||
== Installing Nodes == |
|||
* Click on ''Operations'' → ''Install Nodes'' |
|||
[[Datei:install nodes.png|800px]] |
|||
* A window opens |
|||
** Enter here the node name ''node-red-contrib-amazon-echo'' |
|||
[[Datei:enter node name.png|800px]] |
|||
* The entered node will be installed |
|||
** Information about the installation can be found in the lower left corner of the window |
|||
[[Datei:installation information.png|800px]] |
|||
[[Datei:finished installation.png|800px]]^ |
|||
== Importing the Node == |
|||
* Click on ''Operations'' → ''Importing Nodes'' |
|||
[[Datei:Importing a Node.png|800px]] |
|||
[[Bild:install node-red helper.png|500px]] |
|||
*A small window opens |
|||
** Click on the little house icon |
|||
** Navigate to ''.node-red → node_modules'' |
|||
** Search in this folder after a folder called ''node-red-contrib-amazon-echo'' |
|||
** Select the file ''index.html'', then click OK |
|||
→ Now you have installed everything you need to do the tutorials below |
|||
[[Datei:import alexa.png|800px]] |
|||
= Tutorials = |
|||
*[[Node-RED Tutorial - Part 1]] |
|||
*[[Node-RED Tutorial - Part 2]] |
|||
* If you want to install all nodes which contains e.g. ''smarthome'' in their names just enter ''*smarthome*'' |
|||
Aktuelle Version vom 11. Februar 2020, 09:07 Uhr
Inhaltsverzeichnis
Introduction[Bearbeiten]
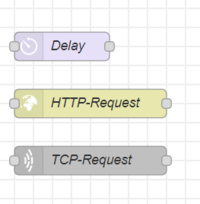
Node-RED is a graphical development tool. With Node-RED, use cases for the Internet of Things can be implemented according to a simple modular principle. In Node-RED there are so-called "nodes" which look like as follows. Each node fulfills a certain function e.g. making a HTTP-request.
Preparations[Bearbeiten]
- If you haven't installed Node.js yet download and install it here: https://nodejs.org/en/download/
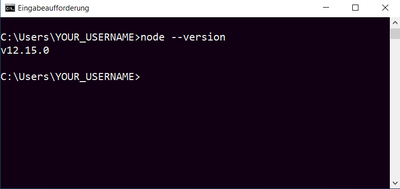
- Use the command line to verify that Node.js has been installed correctly.
- To open the command line enter "cmd" in the Windows search bar and press the enter key.
- After you have opened the command line enter "node --version"
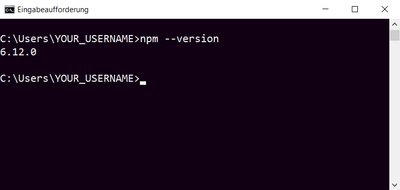
- Also enter "npm --version" in the command line.
- Hint: npm usually comes with Node.js
- Internet connection available?
Installing Node-RED[Bearbeiten]
- Open command line
- Enter "npm install -g --unsafe-perm node-red" and press the enter key
- Enter "node-red" and press the enter key to start Node-RED
- Essential step, because this creates the .node-red folder in your user directory which we need for further steps
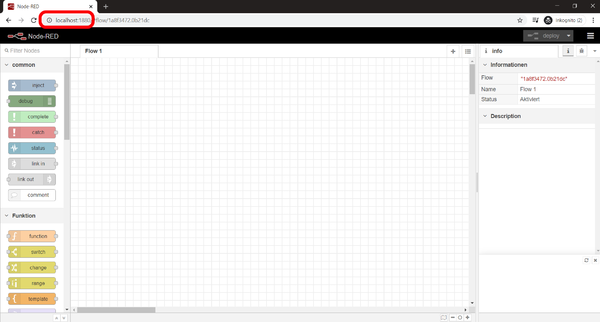
- After you have started Node-RED open your browser (Chrome, Firefox, Internet Explorer, ...)
- Enter "localhost:1880" into the search bar of your browser and press the enter key
→ Close the browser and the command line
- Open a new command line
- Navigate to the .node-red folder created by the start of Node-RED
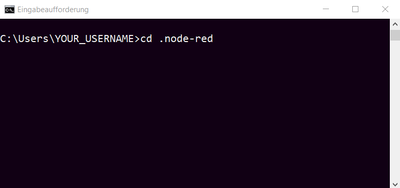
- Enter "cd .node-red" and press the enter key
- Enter "npm install node-red-node-test-helper node-red --save-dev" and press the enter key
- Make sure you are in the .node-red folder
→ Now you have installed everything you need to do the tutorials below
